

The best UV flatbed printer settings are not one universal combination. Start with the approved media preset and safe head clearance for the exact machine, then optimize one controlled test around the substrate, artwork, ink layers, quality target and accepted production speed. Preserve the baseline so every change can be reversed and compared.
(Last modified date: September 12, 2026)
- Confirm nozzles, alignment and fixture before tuning the RIP.
- Use the smallest safe documented head gap.
- Balance pass mode, ink limit and curing as a system.
- Approve color, adhesion, durability and repeatability—not appearance alone.
Define “best result” before changing a setting
A museum-facing panel, a temporary sign and an industrial component may require different detail, color, durability and throughput. Write the acceptance criteria first: viewing distance, smallest text, color tolerance, layer registration, adhesion test, surface finish and accepted pieces per hour.
The settings hierarchy
| Stage | Control | Why first |
|---|---|---|
| Mechanical | Fixture, flatness, head gap, origin | Prevents contact and registration errors |
| Printer condition | Nozzle check and alignment | A bad baseline invalidates profile tests |
| Print mode | Resolution, passes, direction and speed | Controls overlap, detail and throughput |
| Ink structure | Color, white, varnish and layer order | Affects opacity, texture and cure demand |
| Curing | Model-supported UV controls | Must match ink load and substrate |
| Color | Linearization, ink limits and ICC workflow | Optimize after the physical process is stable |
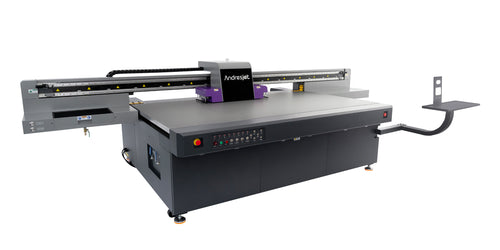
How should you run a test matrix?
- Lock the substrate lot, artwork, fixture and environment.
- Print the approved baseline and label it.
- Change one primary variable across a small range supported by the machine.
- Measure detail, banding, cure, adhesion and production time.
- Select the best candidate, then test the next variable.
- Repeat the winner across multiple pieces and positions on the bed.
- Save the preset with version, date and acceptance result.
Resolve trade-offs instead of chasing maximum values
A higher resolution does not guarantee more useful detail if nozzle condition, head gap or artwork limits the result. More ink may improve density but can increase pooling or cure demand. More UV energy may improve cure in one case yet change gloss, flexibility or media temperature in another. Use the exact model manual and documented ink system.
Optimize accepted output for conversion and production
When comparing machines, require the same substrate and artwork. Record accepted pieces per hour including loading, white/varnish layers and routine interventions. This produces a stronger equipment decision than comparing advertised draft speeds.
Request a configuration-specific print test
Send AndresJet the substrate, dimensions and weight, artwork, smallest feature, target color, white/varnish structure, batch quantity, accepted output and durability criteria. Ask for the exact printer, head, ink, RIP mode and curing setup used on the sample.
Frequently Asked Questions
What DPI is best for UV flatbed printing?
No single DPI is best. Select a supported mode that meets detail and throughput targets on the real substrate.
Should I increase UV power if ink is tacky?
Only after checking ink load, optics, compatibility and the model’s approved cure controls.
Can one preset work on every material?
No. Surface, coating, color layers, geometry and acceptance tests require validated presets.
Sources
- HP — UV Lamp Heat and Print Settings (model-specific)
- Epson SC-V4000 User’s Guide (model-specific)
Share:
How Can You Troubleshoot Ink Smearing Issues in UV Flatbed Printers?
How to Print on Corrugated Materials with a UV Flatbed Printer?