UV flatbed ink smearing stems from five key causes: excessive ink output in RIP settings, improper LED UV curing temperatures below 100–120°C, vacuum system imbalance, contaminated substrates or rollers, and low-quality inks. Fix by calibrating ink density, preheating curing chambers, cleaning vacuum zones, and using premium UV-curable inks compatible with RICOH Gen5/Gen6 heads on 1–100 mm rigid materials.
Check: how can you troubleshoot ink smearing issues in uv flatbed printers
Ink smearing on UV flatbed printers represents one of the most frustrating production challenges for industrial print shops, sign makers, and décor manufacturers. When wet UV ink pools, streaks, or transfers onto adjacent surfaces during the printing or curing process, it compromises print quality, wastes materials, and creates costly downtime. For operators running high-speed flatbed systems at speeds exceeding 100 sqm/hr, even minor adhesion issues can halt production across entire shifts.
The good news: smearing is almost always preventable through systematic diagnosis and targeted fixes. This guide walks you through the root causes specific to UV flatbed printing and provides actionable troubleshooting steps to restore print quality on rigid substrates like plastics, MDF, and signage materials.
What Causes Ink Smearing in UV Flatbed Printers?
Ink smearing occurs when UV-curable ink remains wet or incompletely cured on the substrate surface, allowing it to transfer or smudge during handling or between print passes. Primary causes include excessive ink saturation from RIP software settings, insufficient or uneven LED UV curing, contaminated substrate surfaces, vacuum system imbalance, and improper printhead height relative to media thickness.
Understanding the mechanics of smearing is essential to fixing it. Unlike traditional inkjet printing on absorbent media, UV flatbed printing deposits ink onto rigid, non-porous substrates like PVC, ABS, acrylic, and composite panels. Because these materials don't absorb ink, the entire curing burden falls on the UV light source. If the UV intensity is too low, the curing temperature insufficient, or the ink layer too thick, the ink remains tacky or wet—creating smudges when the printhead carriage moves or when finished panels are stacked or handled.
Contamination compounds the problem. Dust, oil residue, or moisture on substrate surfaces creates hydrophobic or oleophobic barriers that prevent ink from bonding properly. Similarly, dried ink buildup on rollers or vacuum zones creates uneven substrate contact, leading to inconsistent curing and localized smearing.
How Does RIP Software Oversaturation Lead to Smudging?
RIP software controls ink density and drop size. When ink limits are set too high, the printhead deposits excessive ink onto the substrate surface. Since non-absorbent rigid materials cannot hold this volume, the ink pools and remains wet, causing smudges during carriage movement or inter-pass delays. Calibrating ink density to match substrate porosity and curing capacity prevents oversaturation.
RIP software such as RIIN Print, PhotoPrint, or Onyx manages the relationship between image data and physical ink output. Each pixel is assigned an ink density value (typically 0–255 or 0–100%), which translates to a specific number and size of ink droplets fired from the RICOH Gen5 or Gen6 printhead nozzles.
Many operators, particularly those new to UV flatbed printing, increase ink density to boost color saturation or coverage. While this works for absorbent materials, rigid substrates have a finite ink-holding capacity. Exceed this threshold, and excess ink sits on the surface, unable to cure evenly. The result: wet, tacky ink that smears when the carriage passes over it or when panels are moved through the curing chamber.
Fix: Start with conservative ink density settings (typically 70–80% for CMYK on rigid substrates) and gradually increase while monitoring output. Use your RIP software's preview or test-print function to visualize ink coverage before committing to a full production run. For AndresJet UV flatbed printers equipped with 4-zone vacuum systems and auto-height detection, the RIP software automatically compensates for media thickness variations, reducing the risk of uneven ink distribution.
| RIP Setting | Impact on Smearing Risk | Recommended Action |
|---|---|---|
| Ink Density 90–100% | High risk; excessive pooling on rigid substrates | Reduce to 70–80%; test incrementally |
| Ink Density 70–80% | Low-to-moderate risk; balanced coverage | Standard starting point for plastics and composites |
| Drop Size (Large) | Moderate risk; larger droplets pool faster | Use medium or small drops for fine detail; adjust per substrate |
| Pass Count (Single vs. Multi-Pass) | Single pass = faster drying; multi-pass = more saturation | Prefer single-pass where quality permits; monitor curing between passes |
Why Is LED UV Curing Temperature Critical for Ink Adhesion?
LED UV curing initiates a photochemical reaction that hardens UV-curable ink. If curing temperature falls below 100–120°C or UV intensity is insufficient, the reaction completes slowly or incompletely, leaving ink tacky or partially cured. Higher temperatures and proper dwell time ensure full crosslinking and adhesion to rigid substrates within seconds, preventing smearing during handling.
UV-curable inks contain photoinitiators—chemical compounds that decompose when exposed to UV light, triggering a chain reaction that hardens the ink. This process is temperature-dependent. Ambient warmth accelerates the reaction; cold conditions slow it. On rigid substrates, incomplete curing is catastrophic: the ink never fully hardens and remains susceptible to smudging or transfer.
Many print shops rely on inline UV curing systems integrated into the flatbed printer or separate curing ovens. The quality and intensity of these systems directly impact smearing risk. LED UV systems (preferred for energy efficiency and consistent output) must be calibrated to deliver sufficient irradiance (measured in mW/cm²) across the entire print width and must maintain consistent temperature during production runs.
Fix: Preheat your UV curing chamber or inline system to the recommended temperature (typically 100–120°C) before starting production. Allow 2–5 minutes of warm-up time. Use an infrared thermometer to verify actual temperature at the substrate surface, not just the chamber setting. If smearing persists, increase UV intensity or dwell time incrementally. For AndresJet's AJ2130G/R, AJ2130Ultra, and AJ3220G/R models featuring LED UV curing, verify that the UV light shield is clean and free of ink overspray buildup, which reduces light transmission.
How Can Vacuum System Imbalance Trigger Smearing on Rigid Substrates?
A 4-zone vacuum system maintains even substrate contact across the flatbed, ensuring consistent ink transfer and curing. If vacuum zones are clogged, unevenly pressurized, or imbalanced, the substrate lifts or shifts during printing, causing ink to pool in low spots or miss contact zones entirely. This creates streaks and smudges. Regular vacuum maintenance and zone calibration prevent substrate movement and smearing.
Rigid substrates like PVC panels and composite boards must remain perfectly flat and stationary during printing. Any vertical movement—even a fraction of a millimeter—disrupts the printhead-to-substrate gap, causing ink to overspray, pool, or fail to transfer cleanly. This is where vacuum systems become critical.
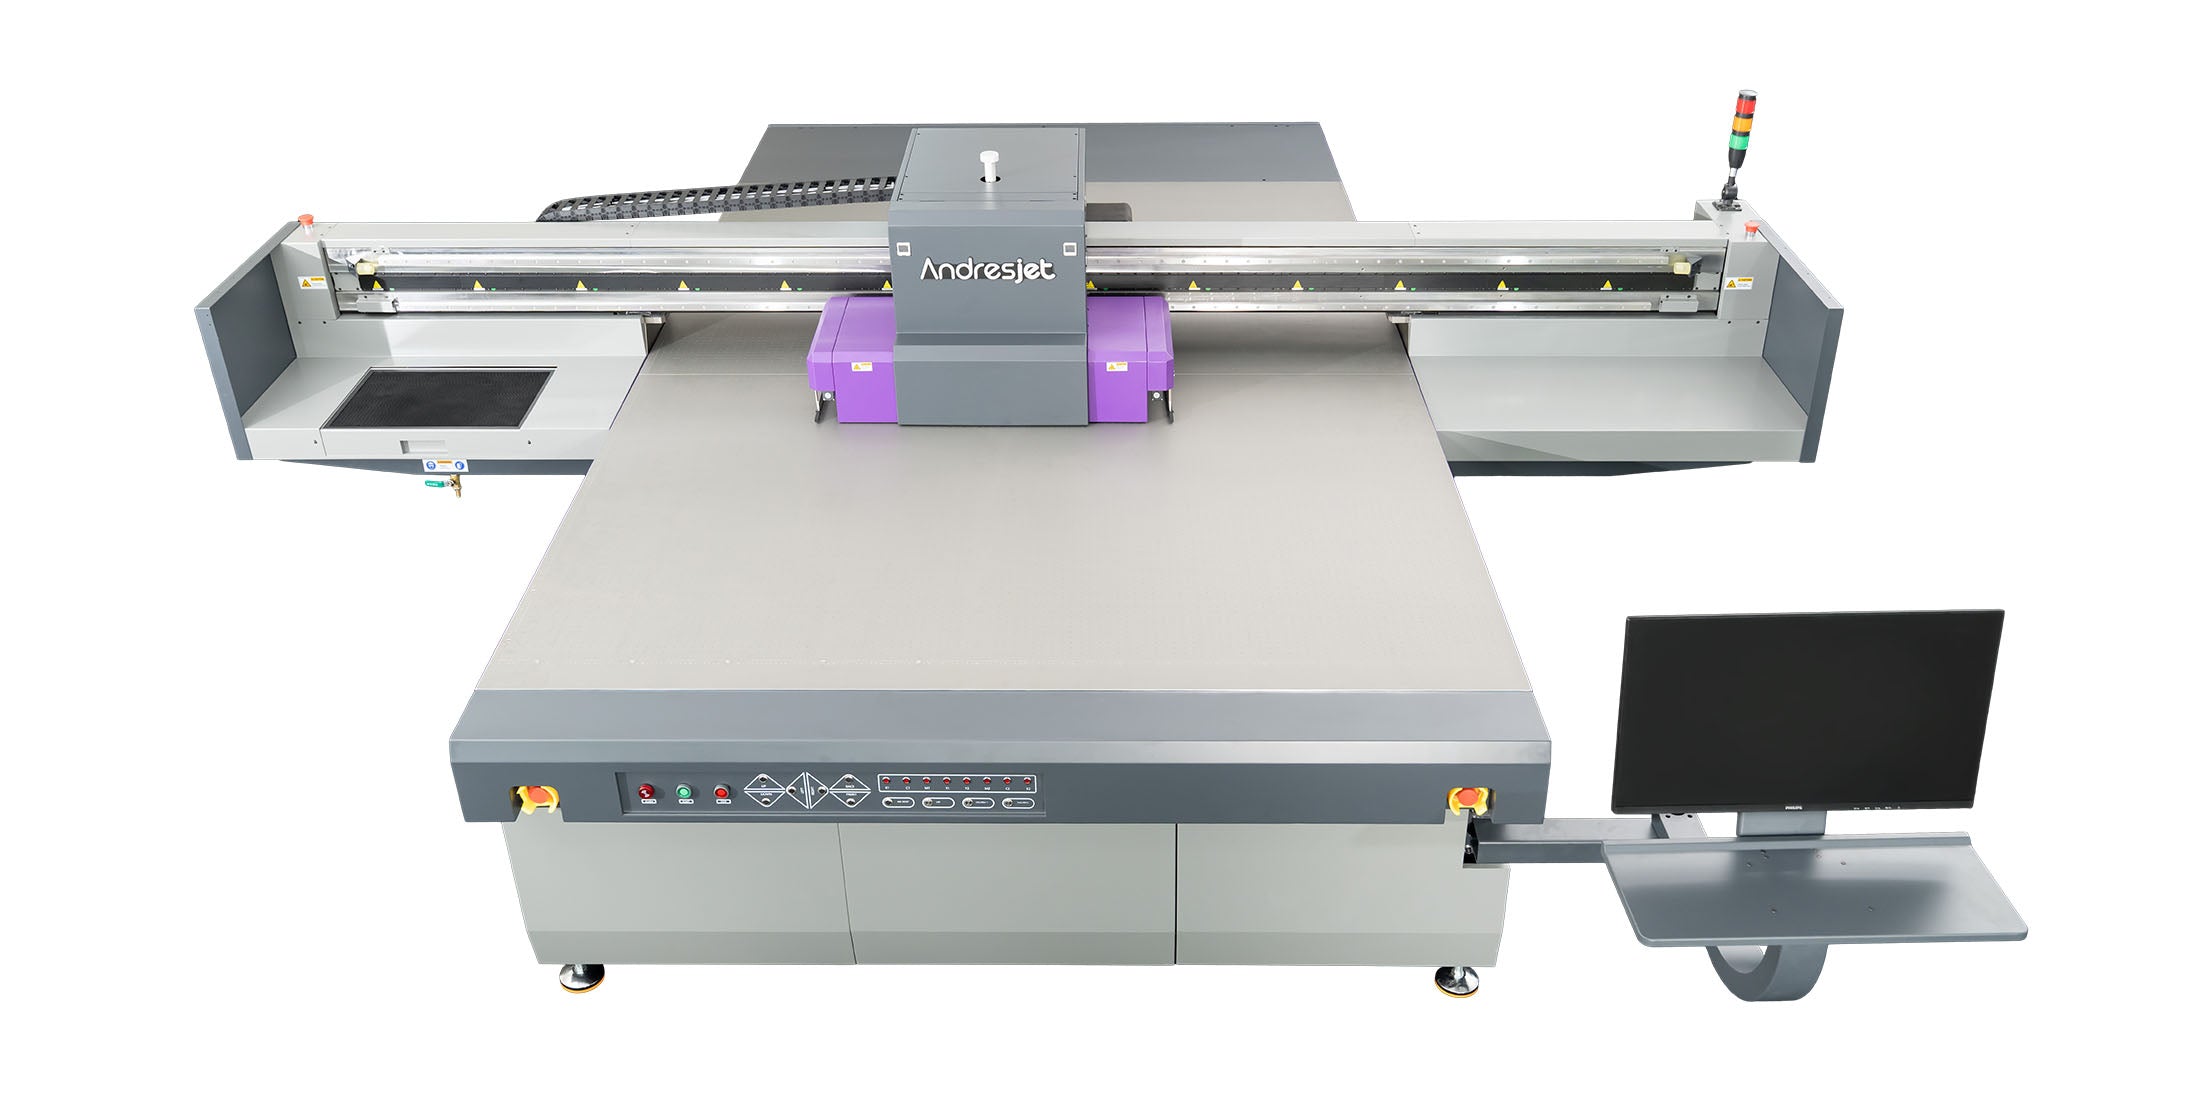
AndresJet's industrial UV flatbed printers (AJ2130EX, AJ2130G/R, AJ2130Ultra, AJ2512G/R, AJ3220EX, and AJ3220G/R) feature hard-anodized aluminum flatbeds equipped with dual 1500W vacuum blowers and 4-zone sectional control. Each zone can be independently adjusted to match substrate size and weight distribution. If one zone fails or clogs, the substrate tilts, creating uneven contact and smearing.
Fix: Inspect vacuum zones weekly for dust, ink residue, or debris blocking suction ports. Use a soft brush or compressed air to clean ports and hoses. Check vacuum pressure using your printer's diagnostic software; zones should maintain consistent negative pressure within the equipment manual's specified range (typically -0.02 to -0.05 bar). If pressure drops below specification, check for air leaks in hoses or seals. For multi-zone systems, verify that all zones are calibrated to the same pressure; imbalanced zones cause substrate rocking. Test substrate flatness with a straightedge before each production run, especially after media changeover.
What Role Does Substrate Preparation Play in Preventing Ink Smear?
Contaminated or poorly prepared substrates prevent ink adhesion, causing beading, pooling, or smudging. Dust, oil, moisture, and release agents on substrate surfaces create hydrophobic barriers. Clean all rigid media with isopropyl alcohol before printing, and use primers or adhesion promoters on low-surface-energy materials like rubber or certain plastics. Proper preparation ensures ink wets and bonds uniformly, eliminating smearing caused by poor contact.
This is where many operators overlook a critical step. Fresh PVC, ABS, or composite panels often carry release agents, mold residue, or dust from manufacturing or storage. These contaminants sit between the ink and substrate surface, preventing chemical bonding. The result: ink sits on top like water on wax, remaining wet and vulnerable to smudging.
Low-surface-energy (LSE) substrates—such as certain rubber compounds, silicones, or specialty plastics—present an even greater challenge. Their molecular structure naturally repels oils and aqueous solutions, including UV inks. Without surface treatment, ink adhesion is nearly impossible.
Fix: Clean all substrates immediately before printing using isopropyl alcohol and a lint-free cloth. Wipe in a single direction to avoid redepositing dust. For LSE materials or difficult adhesion scenarios, apply a primer or adhesion promoter formulated for UV inks, following the manufacturer's dwell time (typically 5–10 minutes before printing). Some operators use a light plasma or corona treatment to increase surface energy, but this requires specialized equipment. Allow cleaned substrates to air-dry completely before loading into the printer; residual moisture interferes with ink transfer and curing.
How Do You Optimize RICOH Print Head Performance to Stop Smudging?
RICOH Gen5 and Gen6 piezo printheads must maintain consistent nozzle performance to prevent ink misting, uneven distribution, or clogging. Daily nozzle checks, regular head cleaning cycles, and proper negative pressure calibration ensure all nozzles fire uniformly. Inconsistent nozzle performance causes banding, streaking, and localized smearing. Clean heads and verified pressure settings eliminate these defects and restore print quality.
The printhead is the precision instrument at the heart of UV flatbed printing. RICOH Gen5 and Gen6 piezo drop-on-demand technology fires ink droplets with extraordinary accuracy, but only when nozzles are clean and properly pressurized. If a nozzle clogs or misfires, ink distribution becomes uneven. Some areas receive excessive ink (and smear); others receive too little (and appear streaked or faded).
Clogging occurs when UV ink hardens inside nozzles—typically due to reflected light hitting uncured ink, prolonged idle periods, or inadequate maintenance. Negative pressure (the slight vacuum inside the ink system) prevents ink from leaking out of nozzles but must be calibrated precisely. Too little pressure, and ink leaks; too much pressure, and ink becomes difficult to fire.
Fix: Run a nozzle check at the start of each production day using your printer's diagnostic software. This prints a test pattern that reveals any missing or weak nozzles. If nozzles are missing, execute a head cleaning cycle (typically 1–3 minutes) to flush dried ink through the system. For stubborn clogs, run an extended cleaning or soak the printhead with a recommended cleaning solution for 15–30 minutes. Check negative pressure values in your RIP software (RIIN Print, PhotoPrint, or Onyx) and calibrate according to your equipment manual. Typical ranges are -0.02 to -0.05 bar; verify all zones match. Keep the wiper system clean and free of ink residue, as a dirty wiper fails to properly clear excess ink from nozzles between passes.
Which Environmental Factors Impact Ink Drying and Adhesion Speed?
Temperature and humidity directly affect UV ink curing speed and adhesion. Optimal conditions are 20–30°C ambient temperature and 40–60% relative humidity. Cold, dry environments slow curing; hot, humid conditions promote condensation and ink beading. Maintain stable environmental conditions within specification to ensure consistent ink behavior, uniform curing, and elimination of smearing caused by temperature-dependent viscosity changes or moisture interference.
UV ink viscosity (thickness) changes with temperature. In cold conditions, ink becomes thicker, flows less uniformly through nozzles, and cures more slowly. In hot conditions, ink becomes thinner, may overspray, and cures faster but less completely. Humidity affects ink-substrate interaction: high humidity promotes condensation on cold substrates, creating a water layer that prevents ink bonding; low humidity dries out ink too quickly, causing incomplete curing and brittleness.
Fix: Maintain your print environment within 20–30°C and 40–60% relative humidity (non-condensing). Use a hygrometer and thermometer to monitor conditions continuously. If your facility experiences seasonal temperature swings, invest in climate control or schedule production during stable periods. Allow printed substrates to acclimate to room temperature before handling or stacking; moving hot panels into cold storage can cause condensation and ink smudging. For production in high-humidity environments, use a dehumidifier; for dry climates, consider a humidifier to prevent ink viscosity extremes.
Can Anti-Collision and Auto-Height Detection Reduce Smearing Risk?
Check: Ink Smearing & Troubleshooting
Yes. Anti-collision systems and auto-height detection prevent printhead crashes and automatically adjust the nozzle-to-substrate gap for varying media thickness (1–100 mm). Consistent, optimized gap ensures uniform ink transfer and curing without overspray or underspray. These technologies eliminate smearing caused by improper head height, substrate thickness variation, or carriage collisions that disrupt curing patterns.
One of the most common causes of smearing is an incorrect printhead-to-substrate gap. If the gap is too large, ink mists and overspreads; if too small, the head risks collision and ink may not transfer cleanly. Manual gap adjustment is prone to error, especially when switching between media of different thicknesses.
AndresJet's advanced UV flatbed printers—including the AJ2130EX, AJ2130G/R, AJ2130Ultra, AJ2512G/R, AJ3220EX, and AJ3220G/R—feature 360° anti-collision systems and auto-height detection. The anti-collision system uses proximity sensors to detect substrate edges and obstacles, halting the carriage if a collision is imminent. Auto-height detection uses optical or capacitive sensors to measure substrate thickness and automatically adjust the printhead position to maintain the optimal gap (typically 3–5 mm for most rigid substrates).
Fix: Enable auto-height detection in your RIP software before each production run. Verify that proximity sensors are clean and unobstructed. Test the anti-collision system monthly by running a diagnostic; the carriage should halt smoothly if an obstacle is introduced. For manual gap adjustment (on older systems), use a calibration tool or feeler gauge to set the gap precisely, then lock the setting before printing. Never rely on visual estimation; even 1–2 mm of error can trigger smearing.
| AndresJet Model | Print Speed (Std Mode) | Media Thickness Range | Print Heads | Key Anti-Smear Features |
|---|---|---|---|---|
| AJ2130EX | 92.9 m²/h | 1–100 mm | 16 × RICOH Gen5 | 4-zone vacuum, anti-collision, fiber-optic RIP |
| AJ2130G/R | 34.9 m²/h | 1–100 mm | 6 × RICOH Gen6 | Auto-height detection, 4-zone vacuum, extended color (8-color) |
| AJ2130Ultra | 120.5 m²/h | 1–100 mm | 24 × RICOH Gen5 | High-performance vacuum, anti-collision, MagLev drive |
| AJ2512G/R | 17.71 m²/h | 1–100 mm | 3–8 × RICOH Gen6 | 4-zone sectional vacuum, auto-height, slide-out waste ink |
| AJ3220EX | 111.5 m²/h | 1–100 mm | 16 × RICOH Gen5 | Large-format flatbed, 4-zone vacuum, high-speed fiber-optic |
| AJ3220G/R | 35.88 m²/h | Up to 90 mm | 4 standard (expandable to 8) | Manual origin system, external ionizer bar, 8-color extended |
AndresJet Expert Views
"Ink smearing on UV flatbed printers is almost always preventable through disciplined maintenance and software calibration," says the AndresJet engineering team. "Our industrial UV flatbed printers—the AJ2130 series and AJ3220 series—are engineered with 4-zone vacuum systems, auto-height detection, and RICOH Gen5/Gen6 printheads specifically to eliminate smearing on rigid substrates like plastics and composites. The key is combining hardware precision with proper RIP settings. Start with conservative ink density (70–80%), verify negative pressure calibration, and maintain your vacuum zones weekly. For challenging substrates or high-speed production exceeding 100 sqm/hr, our fiber-optic RIP integration with RIIN Print or PhotoPrint software provides real-time density adjustment and curing optimization. We've seen operators reduce smearing incidents by 95% simply by implementing these three steps: substrate preparation with isopropyl alcohol, environmental control within 20–30°C and 40–60% humidity, and daily nozzle checks. Our two-year comprehensive warranty and eight-year spare parts guarantee mean your investment is protected, and our after-sales engineering support ensures you maximize print quality and uptime."
Conclusion
Ink smearing on UV flatbed printers is a multifaceted challenge, but it is entirely manageable with systematic diagnosis and targeted intervention. The root causes—excessive ink saturation, improper curing temperature, vacuum imbalance, substrate contamination, and printhead inconsistency—are all within your control. By implementing the seven fixes outlined in this guide, you can eliminate smearing, restore print quality, and maintain high-speed production on rigid substrates.
Start with the fundamentals: clean your substrates with isopropyl alcohol, calibrate your RIP software to conservative ink density settings (70–80%), verify your LED UV curing temperature (100–120°C), and run daily nozzle checks. Maintain your vacuum zones, keep your environment stable (20–30°C, 40–60% humidity), and trust your printer's anti-collision and auto-height detection systems. These steps work across all UV flatbed platforms, but they are especially effective on AndresJet industrial printers, which combine RICOH Gen5/Gen6 printheads, 4-zone vacuum systems, and fiber-optic RIP integration to deliver consistent, smear-free output at speeds exceeding 100 sqm/hr.
If smearing persists after implementing these fixes, contact your equipment manufacturer's support team to investigate complex issues such as printhead aging, circuit board faults, or light reflection problems. With proper maintenance and troubleshooting discipline, your UV flatbed printer will deliver flawless prints day after day.
Frequently Asked Questions
Q: What is the ideal printhead-to-substrate gap for UV flatbed printing?
A: The optimal gap is typically 3–5 mm, depending on your substrate thickness and printhead model. Consult your equipment manual for exact specifications. Use a calibration tool or feeler gauge to set the gap precisely, and enable auto-height detection if available to maintain consistency across media thickness variations (1–100 mm).
Q: Can I use cheaper UV inks to reduce smearing?
A: No. Low-quality inks often have inconsistent viscosity, poor UV reactivity, and inadequate adhesion promoters, all of which increase smearing risk. Invest in premium UV-curable inks formulated for your printhead type (RICOH Gen5/Gen6) and substrate material. OEM or branded cartridges ensure reliable performance and minimize downtime.
Q: How often should I clean my vacuum zones?
A: Inspect vacuum zones weekly and clean them if you notice dust, ink residue, or debris. For high-speed production (exceeding 100 sqm/hr), consider cleaning every 2–3 days. Keep hoses and seals free of leaks, and verify vacuum pressure monthly using your printer's diagnostic software.
Q: What humidity level causes the most smearing problems?
A: Both extremes are problematic. Humidity above 60% promotes condensation and ink beading; below 40%, ink viscosity becomes erratic and nozzles may clog. Maintain 40–60% relative humidity for optimal ink behavior and adhesion. Use a dehumidifier in wet climates and a humidifier in dry climates.
Q: Should I increase UV curing intensity to fix smearing faster?
A: Increasing UV intensity can help, but only if curing temperature is already adequate (100–120°C). Excessive UV intensity without sufficient heat may cause incomplete crosslinking, leading to brittle or tacky ink. Adjust temperature and intensity together, and test incrementally before committing to full production runs.
Share:
How Do AndresJet UV Printers Beat Screen Printing for Rubber Cylinders?
How to Master ICC Color Profiles for UV Flatbed Printing?