

- by John White
How Can You Print on Uneven Surfaces with a UV Flatbed Printer?
- by John White
Print bigger, print faster — wide-format UV flatbed printers for signs, decor and industrial work.

A UV flatbed printer can print on some uneven and textured surfaces, but the safe and achievable result depends on the object’s highest point, the difference between its highest and lowest printable areas, the printer’s model-specific head-clearance limits, surface reflectivity, ink adhesion and the required image quality. Measure the real object and approve a sample before production; do not assume that maximum object thickness means the printer can follow a changing contour.
(Last modified date: September 11, 2026)
Before you print:

Usually, a flatbed printer establishes a printing plane above the object; it does not automatically trace every peak and valley like a machining tool. Height detection may help establish the object height on supported models, while any automatic height adjustment or wide-gap mode is model-specific. It should not be described as real-time contour following unless the selected machine’s documentation explicitly confirms that function.
The practical limit is often the height difference within the image area. As the lower parts move farther from the printhead, droplets travel farther and fine details, small text and edge definition can deteriorate. Roland’s model-specific guidance, for example, warns that quality at lower positions degrades as the height difference increases. Its numerical limit applies only to the cited Roland model, but the underlying reason is relevant to equipment evaluation.
| Measurement | Why it matters | What to provide |
|---|---|---|
| Maximum object height | Determines whether the object and fixture fit within the machine’s loading range. | Height including fixture and any raised hardware. |
| Highest-to-lowest difference | Changes the effective head-to-surface distance across the artwork. | Measured variation inside the intended print area, not the entire object alone. |
| Highest-point location | A peak in the carriage path can create a collision risk even when most of the object is lower. | Side photographs, dimensions and a marked print-zone drawing. |
Also state whether the intended image crosses a recess, sharp step, seam or near-vertical wall. A flatbed may print a horizontal or gently varying top surface, but it generally cannot print a surface perpendicular to the nozzles in the same pass.
Ink droplets are exposed to air movement and positional error while travelling from the nozzles to the object. A wider gap may reduce collision risk, but it can also increase misting, satellite dots and loss of sharpness. The correct setting is therefore the smallest safe, documented clearance that works with the actual topography—not the largest available gap.
Reflective objects need additional caution. Epson’s operating guidance notes that UV light reflected by an uneven surface or jig can reach the printhead and contribute to nozzle clogging. Bare mirrors, polished metal and reflective fixtures should be reviewed against the exact printer manual and ink system before a trial.
An irregular part that moves, rocks or sits at a different angle on every load cannot produce a stable batch. A fixture should locate the part from consistent datums, resist carriage airflow and motion, expose the complete print zone, and remain clear of the printhead path. Fill or shield gaps between adjacent pieces only where the equipment instructions permit it.
For a repeated job, record the fixture version, orientation, origin, object lot and approved settings. These details turn one successful sample into a process that operators can reproduce.
“Plastic,” “wood” or “metal” is not enough to predict adhesion. Coatings, release agents, oil, dust, porosity and surface energy can differ between visually similar parts. Start with a material-compatible cleaning method, then compare untreated and prepared samples. Use a primer or other pretreatment only after compatibility and durability testing; an unnecessary or incompatible primer can create a new failure mode.
Do not change every setting at once. Establish a safe height first, then compare a limited set of print modes while keeping the artwork and substrate constant.
| Variable | What to watch |
|---|---|
| Head height / gap | Collision clearance, sharpness, misting and small-text quality |
| Pass count and speed | Coverage, banding, productivity and consistency |
| Ink layer structure | Color on dark or transparent media, pooling and surface build |
| UV curing setting | Tack, adhesion, gloss, brittleness and heat sensitivity |
| Artwork placement | Whether critical details cross deep texture, steps or recesses |
Large solid areas may reveal coverage variation that a small logo hides, while fine text exposes placement errors sooner than a broad graphic. Use a test file that represents the most difficult production artwork.
Peaks, valleys and heavy ink layers may not receive identical curing conditions. A surface that feels dry immediately after printing may still fail the customer’s handling or durability requirement. Define the acceptance test before the sample: adhesion, abrasion, flexibility, chemical contact, outdoor exposure or another end-use criterion.
Record the printer configuration, ink set, pretreatment, layer order, print mode and curing settings used for the approved sample. If any of those variables changes, confirm the result again.
A useful enquiry allows the technical team to reject an unsuitable setup early or recommend a configuration that can be demonstrated. Send:
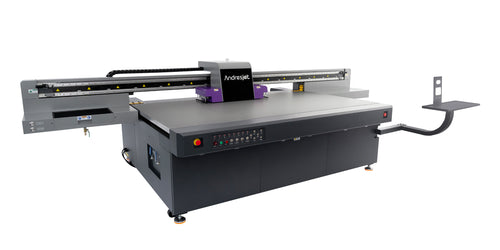
Send AndresJet your object details for a configuration-specific sample review, or compare the wide-format UV flatbed printer range. A printability or performance claim should be made only after the actual object and proposed configuration have been tested.
It may print some height variation, but quality generally declines as the lower areas move farther from the printhead. Safe limits and supported adjustment functions depend on the exact printer model, so the real object should be measured and tested.
No. Object thickness determines whether the item fits in the machine. Printable height variation describes the difference between the highest and lowest areas within the artwork and is often the more important quality constraint.
Not by itself. More clearance may reduce collision risk but can reduce droplet-placement accuracy. Use the smallest safe setting allowed by the specific printer and prove the result with representative artwork.
No. Primer depends on the substrate, coating, ink system and durability target. Compare prepared and untreated samples, then use only a verified, compatible process.
A conventional downward-firing flatbed setup generally prints upward-facing areas, not surfaces perpendicular to the nozzles. Another orientation, fixture or printing method may be required.
Send the actual part or representative sample together with dimensions, surface-height variation, photographs, artwork, batch target and acceptance tests. A configuration-specific sample is more reliable than a generic clearance claim.


