

How Can You Achieve High-Gloss Finishes with a UV Flatbed Printer?
- by John White
Print bigger, print faster — wide-format UV flatbed printers for signs, decor and industrial work.

A high-gloss UV flatbed finish requires a smooth, compatible surface and a validated clear-ink workflow. Gloss is influenced by substrate texture, CMYK/white layer build, clear ink coverage, droplet leveling and curing timing. Increasing varnish or UV power without testing can produce texture, haze, pinholes, brittleness or uneven gloss.
(Last modified date: September 13, 2026)
A smooth transparent film reflects light more uniformly than a rough one. The substrate underneath, ink-film thickness and curing behavior determine whether clear ink levels before it polymerizes. Roland’s model-specific guide shows that glossy and matte results can use different print orders and illumination behavior; those settings must not be copied to another printer.
| Effect | Artwork/setup | Acceptance check |
|---|---|---|
| Flood gloss | Clear layer over the complete image | Uniform reflection and no edge pooling |
| Spot gloss | Named clear/varnish spot objects | Registration to text or graphics |
| Raised texture | Multiple supported clear layers | Height consistency, cure and edge quality |
| Gloss/matte contrast | Separate effects and model-supported order | Contrast under intended lighting |
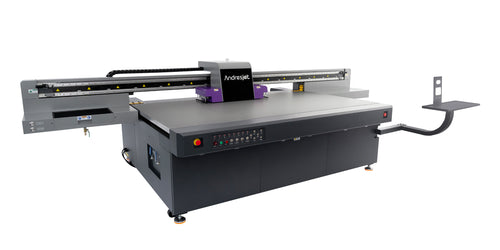
Common causes include substrate texture, dust, inconsistent clear coverage, missing nozzles, excessive film build, poor registration or unsuitable cure. Determine whether the defect follows the artwork, carriage path or material before changing settings.
Send AndresJet the substrate, coating, dimensions, artwork with the clear layer, desired flood/spot/raised effect, viewing light, batch size and required rub or chemical test. Ask the team to record the printer, ink configuration, layer order, mode and curing setup used.
A useful gloss trial changes one variable at a time. Keep the artwork, substrate lot, cleaning method and viewing light constant, then compare only the supported clear-ink mode or layer count. Label every sample on the back. This turns a visual preference into a repeatable production decision instead of an operator’s memory.
| Variable | Keep constant | What to record |
|---|---|---|
| Clear mode or layer build | Same image and material | Mode name, passes and layer sequence |
| Curing setup | Same clear coverage | Supported setting and visible surface change |
| Substrate lot | Same print file and mode | Coating, texture and cleaning method |
Do not specify clear UV ink only because the sample looks shiny. A separate coating, laminate or another decoration process may be more appropriate when the part needs deep draw, frequent flexing, demanding chemical resistance or a compliance condition the ink system has not been validated for. The correct decision is the process that passes the end-use test at the required cost and cycle time.
Approve a signed reference sample and define the inspection distance, light source, allowable registration error, surface defects and durability test. Also record whether fingerprints, edge buildup or variation across the bed are acceptable. For repeat orders, compare the first approved piece and periodic production samples against that reference before packing.
For the complete decision path, continue with the small-format uv flatbed printers guide.
No. Excess film can create texture, pooling or incomplete cure.
It may change surface resistance, but protection must be proven against the defined use.
The selected mode, curing behavior, surface texture or droplet pattern may suppress gloss.


